Skip to content

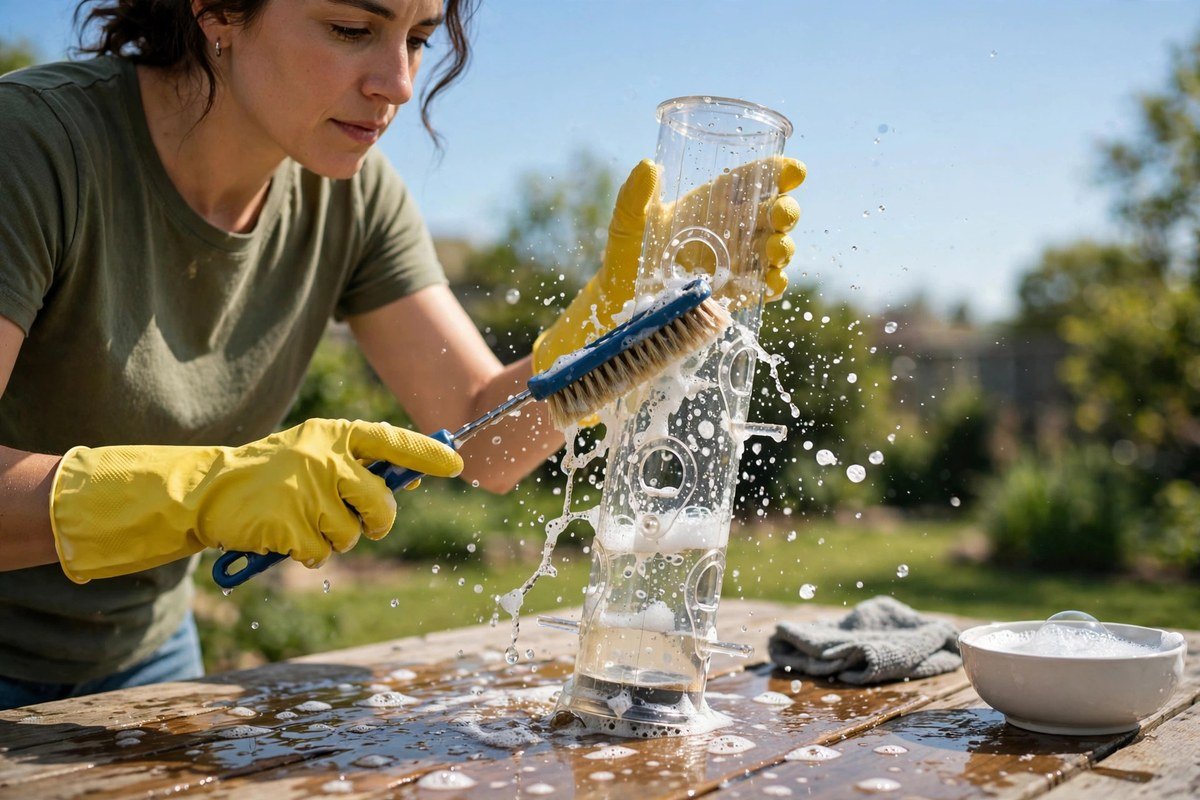
A feeder full of fresh seed looks like a gift to your backyard birds. Let it sit through rain, heat, and a steady parade of visitors, and that same feeder can quietly turn into one of the biggest health hazards those birds face. Learning how to clean bird feeders is the single most effective thing you can do to protect the flock that visits your yard.
Dirty feeders spread disease. Moist seed grows mold, droppings mix into food, and the perches where birds rub their faces become shared surfaces for bacteria and parasites. The fix is straightforward: a simple cleaning routine, the right disinfecting solution, and a schedule matched to each feeder type. This guide walks you through all of it, from the bleach ratio recommended by wildlife agencies to what to do when a sick bird shows up.

Why a Dirty Feeder Can Hurt Birds
Backyard birds gather in dense crowds at feeders. That crowding is the problem. Where dozens of birds eat beak to beak from the same tray, germs travel fast, and the feeder surface itself can carry pathogens from one visitor to the next.
Several real diseases are tied directly to neglected feeders. Maryland’s Department of Natural Resources traces house finch conjunctivitis, caused by the bacterium Mycoplasma gallisepticum, back to birds first noticed in Washington, D.C. in 1994. Affected finches develop red, swollen, crusty eyes, and the infection has since been documented in American goldfinches, evening grosbeaks, and purple finches as well.
Salmonellosis is another feeder-linked illness. According to Georgia wildlife biologists, birds infected with salmonella often act lethargic and let people approach, although some infected birds show no symptoms at all. Cornell researchers have tied songbird salmonella outbreaks to feeding stations, and their advice is blunt: clean feeders with a 10 percent bleach solution, or stop feeding until warm weather passes. The Cornell Chronicle covered one such outbreak in redpolls and other flocking species.
Parasites and fungi join the list. Trichomonosis, a parasitic disease, has been found in doves and finches picked up at contaminated feeders, and it is both deadly and highly contagious. Wet, moldy seed hulls under feeders can trigger aspergillosis, a fungal infection that causes respiratory distress in birds. Avian pox produces wart-like lesions on a bird’s face, legs, or feet and can spread through mosquitoes as well as at the feeder itself.
None of this means feeding birds is dangerous by default. The same Georgia DNR guidance notes that a hygienic feeder reduces risk tremendously. Disease is one of the top threats birds face that backyarders can actually control, and cleaning is the control. Even the avian flu context fits here: Georgia DNR notes that highly pathogenic avian influenza is unlikely to become widespread in songbirds except in scavenging species like crows, but regular feeder hygiene still lowers the risk of the many diseases that do affect songbirds.
How Often to Clean Each Type of Feeder
There is no single schedule for every feeder. A nectar feeder in August needs attention far more often than a tube feeder in January. Match the rhythm to the food and the season.
| Feeder type | Clean every | Why it matters |
|---|---|---|
| Seed feeders (tube, hopper) | Every 2 weeks | Saliva, droppings, and moisture build up in seed chambers |
| Hummingbird feeders | Every 3 to 5 days in summer | Sugar water ferments fast; mold can form on feeding ports |
| Suet feeders | Every 2 weeks; more often in heat | Suet goes rancid in warm weather and grease traps debris |
| Platform and tray feeders | Weekly, or every few days in wet weather | Birds stand directly in the food, so droppings contaminate it fast |
| Thistle (nyjer) feeders | Every 2 weeks | Tiny seed clumps in humidity and molds in narrow tubes |
These intervals come straight from wildlife agencies. Project FeederWatch recommends cleaning every two weeks as a baseline, and UNH Extension gives the same every-other-week schedule for seed feeders. For hummingbirds, UNH advises changing the sugar water every three to five days and cleaning the feeder itself weekly with hot water. Georgia DNR pushes a weekly schedule in warm months, when disease pressure runs highest.
Weather should move the schedule up. Rain soaks seed, heat spoils nectar and suet, and heavy traffic multiplies contamination. If you see droppings on perches, clumped or discolored seed, or a sour smell, clean now regardless of the calendar. For detailed nectar recipes and port designs, see the hummingbird feeder guide, and for suet specifics, the suet feeding guide covers what to offer and when.

What You Need to Clean Bird Feeders
You do not need special equipment. A simple kit handles every feeder type.
- Household bleach: For the standard disinfecting soak, one part bleach to nine parts water. This 10 percent solution is the ratio recommended by UNH Extension, Project FeederWatch, and state wildlife agencies.
- White vinegar: A gentle alternative for feeders that cannot be rinsed thoroughly, like hummingbird feeders with tiny ports. UNH suggests one part vinegar to one part water for a general soak.
- Dish soap: Plain, unscented dish soap for the initial scrub. Avoid antibacterial or heavily scented formulas.
- Brushes: A stiff bottle brush for tube feeders, a small brush or old toothbrush for perches, seams, and ports. Grime hides in cracks.
- A bucket or basin: Large enough to submerge the feeder. Use an outdoor tub rather than anything in the kitchen.
- Rubber gloves: Protect your hands from bleach and from whatever the feeder is carrying.
- A mask: Wear one when brushing off dry debris or raking under feeders, so you do not breathe in dust or fungal spores.
Choose the right solution for the right feeder. The bleach mix disinfects seed, suet, and platform feeders thoroughly. For hummingbird feeders, many guides advise skipping bleach and soap entirely, since the narrow ports are hard to rinse clean, and recommend hot water with a vinegar soak instead. When in doubt, pick the gentler method and rinse longer.
How to Clean Bird Feeders Step by Step
Do this outdoors or in a laundry sink, never in the kitchen sink where food is prepared. The CDC-aligned guidance shared by Mississippi State Extension makes that point explicit: clean feeders outside, and if you must clean them inside, disinfect the tub or sink immediately afterward. Work through these steps for each feeder.
- Empty the feeder completely. Pour out all remaining seed and inspect it. Discard any seed that is damp, clumped, discolored, or musty. Put spoiled seed in a sealed trash bag, not on the ground, where other birds and rodents can reach it.
- Take the feeder apart. Remove the roof, base, perches, and any removable trays. Separating the parts lets you reach the seams and corners where mold and bacteria collect.
- Knock off loose debris. Shake out hulls and dust, then brush every surface with a dry brush. Removing the loose material first makes the disinfectant far more effective.
- Scrub with hot, soapy water. Wash all parts with plain dish soap and hot water, using the bottle brush inside tubes and the toothbrush on perches, ports, and seams. This is the step that removes the physical film where germs hide.
- Soak in the bleach solution. Submerge the parts in one part bleach to nine parts water for ten to fifteen minutes. Mississippi State Extension cites CDC guidance of ten minutes, while UNH Extension recommends fifteen. Either way, the soak is what kills remaining bacteria and mites.
- Rinse thoroughly. Rinse every part under clean running water, several times. Bleach residue can be harmful, so do not rush this. Some people rinse once more with vinegar water to neutralize any lingering soap or bleach film.
- Air dry completely. Set the parts in sunlight and let them dry fully before reassembling. Sunlight adds a mild extra disinfecting effect, and a damp feeder just restarts the mold cycle.
- Refill with fresh seed. Add only as much seed as your birds will eat within a few days. Small, frequent refills stay fresher than a feeder topped off for a month.
While the feeder dries, wipe down the pole, baffle, and hanging hardware with the same bleach solution. Dirty hardware recontaminates a clean feeder the moment you hang it back up.
How to Clean Hummingbird Feeders
Hummingbird feeders play by stricter rules. Nectar is sugar water, and in summer heat it can ferment and grow mold within days. That makes the cleaning cycle faster and the methods gentler.
Empty and refill nectar every three to five days, and every two to three days when temperatures climb past 85 degrees. Once a week, take the feeder apart and wash it in hot water with a bottle brush, paying special attention to the feeding ports and the reservoir threads. UNH Extension recommends using just hot water for this weekly clean, with no soap or detergent, because residues are hard to rinse from tiny ports.
For a deeper clean, soak the parts in a vinegar solution, one part white vinegar to four parts water, for at least ten minutes, then rinse thoroughly and air dry. If you see black mold spots on the ports, soak longer and scrub with a small port brush or pipe cleaner before reassembling. Never use soap, bleach, or pesticides on a hummingbird feeder unless you can rinse it exhaustively, and never try to repel ants with oils or sticky substances around the ports. Those chemicals contaminate the nectar.
Keep a spare feeder if hummingbirds visit your yard regularly. Swapping a freshly cleaned feeder in while the other dries means your birds never go without. The hummingbird feeder guide covers placement and nectar ratios in more detail.
Suet, Thistle, and Platform Feeders: Special Notes
Each feeder style has its own weak points. A quick pass over these saves you from the problems each design invites.
Suet Feeders
Suet is animal fat, and fat goes rancid, especially above 70 degrees. Clean suet cages every two weeks at minimum, and pull them entirely during the hottest weeks of summer if the suet softens or smells off. Scrub the wire cage with hot, soapy water and give it the same 1-to-9 bleach soak as seed feeders. Check the suet feeding guide for which suet types hold up best in warm weather.
Thistle and Nyjer Feeders
Nyjer seed is tiny and oily, so it clumps in humidity and plugs the narrow feeding slits. Shake the feeder regularly to break up clumps, and clean it on the two-week schedule. If the seed looks matted or smells stale, discard it. Thistle socks can go through the washing machine, but tube feeders need the full brush and bleach treatment.
Platform and Tray Feeders
These are the hardest feeders to keep clean because birds stand directly in the food. Clean platform feeders weekly, and every few days during wet weather or heavy use. Use feeders with drainage holes or mesh bottoms so rain passes through instead of pooling. Never let seed sit in standing water, since that is where mold takes hold fastest.
Choose Feeder Materials That Are Easy to Sanitize
Georgia DNR makes this point directly: plastic and glass feeders are significantly more sanitary and easier to clean than wood feeders, which absorb moisture and hold it against the seed. Non-porous surfaces also release grime faster and survive repeated bleach soaks without degrading.
When you shop for a feeder, look for smooth, removable parts. A tube feeder that disassembles into a handful of smooth pieces takes five minutes to clean. A decorative wooden feeder with glued seams and carved crevices can take twenty minutes and still harbor debris. If you enjoy building your own, the DIY bird feeder guide shows simple designs, and choosing easy-to-clean materials at the build stage pays off for years.
Retire feeders that cannot be cleaned properly anymore. Cracked plastic harbors bacteria in the fissures, peeling finishes trap moisture, and rotted wood never truly sanitizes. Replacing a worn feeder costs far less than the cost of a disease outbreak it helped cause.
What to Do When Sick Birds Appear
Watch for the warning signs: a finch with red, swollen, crusty eyes; a bird that sits puffed up and listless; any bird that lets you walk right up to it. Georgia DNR wildlife biologists note that salmonella-infected birds often appear lethargic and easily approached, though some show no symptoms at all.
If you spot a sick bird at your feeder, act the same day: take the feeder down, scrub it with the full bleach method, and keep it down while the sick birds disperse. Project FeederWatch recommends removing feeders for a couple of weeks when disease appears, and cleaning the feeder area thoroughly while they are down. Georgia DNR recommends taking feeders down for at least a week. Do not handle a sick or dead bird with bare hands, and do not try to treat it yourself.
A licensed wildlife rehabilitator is the right call for a bird that needs intervention.
Multiple dead birds in a small area signal something bigger. Georgia DNR asks residents to report incidents of four or more dead birds in a short period to the state’s Wildlife Conservation Section, since clusters can indicate an outbreak worth investigating.
The ground matters as much as the feeder. Rake up seed hulls, spilled seed, and droppings beneath your feeders two or more times a week, and dispose of the material in a sealed bag. Wear a mask while raking to avoid inhaling dust and fungal spores.
Spacing feeders at least a few feet apart, or moving them twenty feet to fresh ground periodically, further reduces crowding and contamination. A clean bird bath rounds out the hygiene picture, since birds drink and bathe where they feed.

Frequently Asked Questions
Can I clean bird feeders with vinegar instead of bleach?
Yes, for routine cleaning. A solution of one part white vinegar to one part water, per UNH Extension, handles light cleaning and deodorizing. Vinegar is a good choice for hummingbird feeders, whose small ports are hard to rinse. For disinfection after a disease scare or a deep seasonal clean, the 1-to-9 bleach solution is stronger and remains the standard recommendation from wildlife agencies.
Can I put a bird feeder in the dishwasher?
Only if the manufacturer says it is dishwasher-safe. Heat and harsh detergents warp plastic, strip finishes, and can damage glued joints on wooden feeders. For most feeders, hand washing with the bleach soak is safer and just as effective. Check the feeder’s instructions before trying the dishwasher.
How do I know when a feeder needs cleaning?
Look for clumped or discolored seed, a sour or musty smell, droppings on perches or trays, mold spots, or algae on nectar ports. If any of those are present, clean immediately rather than waiting for the next scheduled clean. Sick-looking birds at the feeder are also a signal to clean and temporarily take the feeder down.
Is it safe to clean feeders indoors?
Outdoors is best. The CDC-aligned guidance shared by Mississippi State Extension recommends cleaning feeders outside with warm, soapy water, and warns against using the kitchen sink or any area where food is prepared. If you must use an indoor tub or laundry sink, clean and disinfect it immediately afterward, and always wash your hands thoroughly when you finish.
What should I do with old seed when I clean the feeder?
Discard any seed that is damp, clumped, discolored, or smells off. Put it in a sealed trash bag, not on the ground or in a compost pile, where birds, pets, and rodents can reach it. Never mix old seed with fresh seed when refilling. Starting each refill with a fully emptied, fully dry feeder is part of the hygiene routine.
Should I clean feeders in winter too?
Yes. Disease pressure may be lower in cold weather, but winter feeders get the heaviest traffic of the year, and crowding itself drives transmission. Keep the every-two-week schedule through winter, and bring feeders in for a full deep clean at least once during the season. In bear country, many agencies also advise taking feeders down entirely in spring, per seasonal wildlife guidance.
Conclusion
Knowing how to clean bird feeders turns a good habit into a genuinely protective one. The formula is simple: scrub with hot, soapy water, disinfect with one part bleach to nine parts water, rinse thoroughly, and let every part dry completely before refilling. Match the schedule to the feeder, every two weeks for seed, every few days for nectar in summer, and clean the ground underneath just as faithfully.
When a sick bird appears, act quickly: take the feeder down for a week or two, disinfect it thoroughly, and give the flock room to disperse. The birds that visit your yard depend on you for more than food. A clean feeder is the difference between a feeding station that helps them and one that harms them, and keeping yours clean takes less time than most people expect.